
- February 4th, 2022, 9:49 am#4966728
I'ts been 10 years since I started my last scratchbuild shell and I thought it would be a great anniversary to start my final build that I've been talking myself in and out of for the past several years. My previous shell is something I'm very proud of and grateful for but has a few quirks I wanted to re-adjust. I probably could of more or less just pulled a cast from my mold and hacked into it and made the adjustments necessary but I thought it would be more fun to just start from the ground up and document my progress as it might help some future scratchbuilders that are eager to start their own builds.
I've got some new measurements from MBurkit (Thank you) in addition to some previous ones I've had that might help fill in some gaps in the areas I more or less had to guess. I know Mack Factory is releasing a direct cast Sony Lobby Hero/Spengler shell that will put an end to all the measurement speculation but until then I thought it would be more fun and perhaps nostalgic to be like the old days and try to get as close as I can without having it on hand.
As for the materials I will be using .080 styrene for most of the structure and of course will be using .125 (1/8 inch) for the various ribs, cyclotron rings, and syncgen plates. Looking back in hindsight I can't believe I finished my first shell in roughly 2 months. This shell might take a little longer then that as I plan to be a lot more tedious with the measurements.
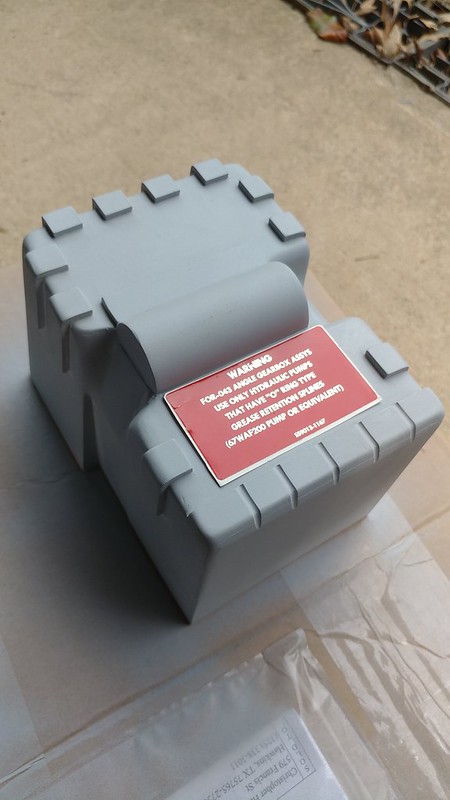
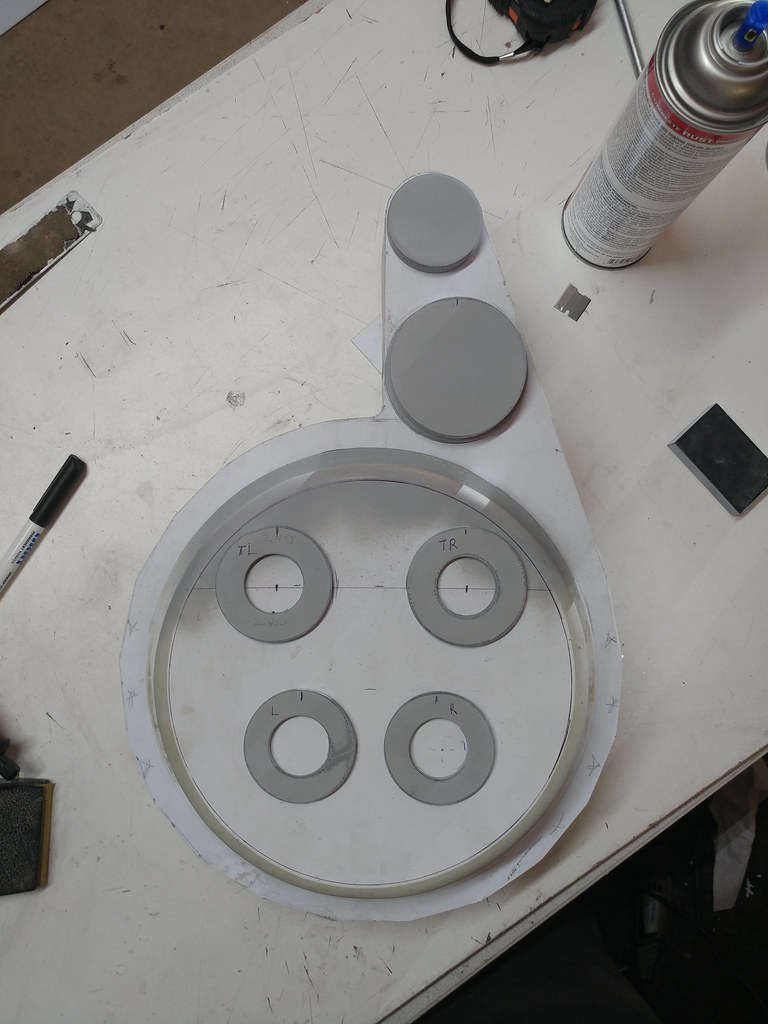
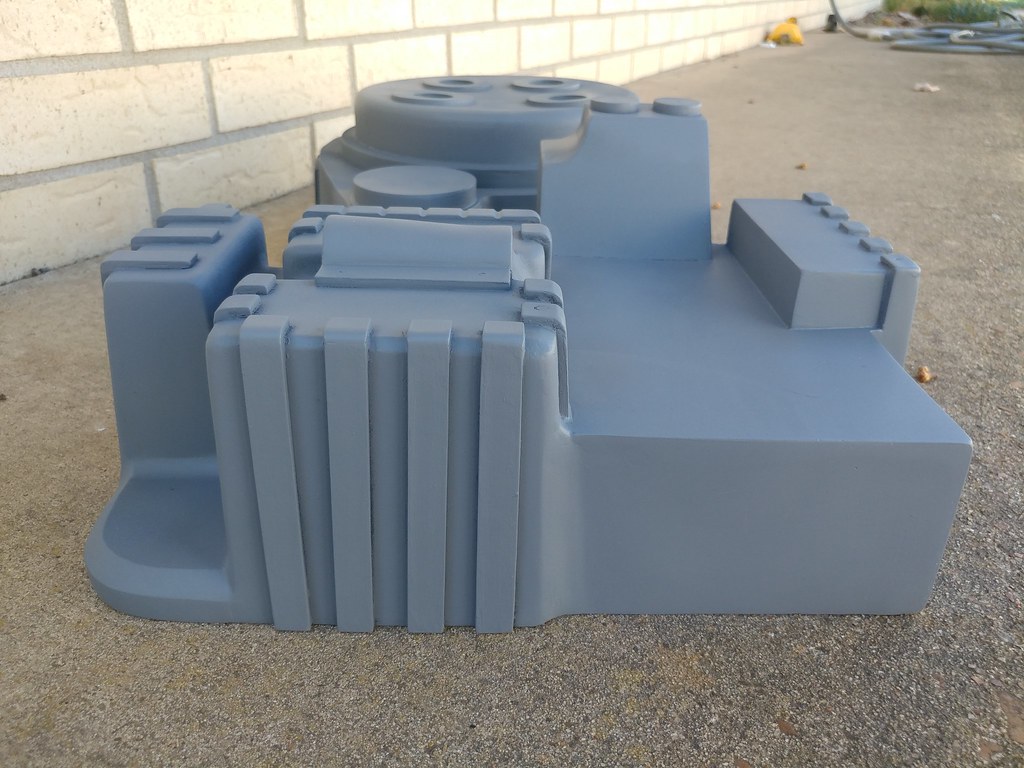
Of course I started with the powercell like my last build. This probably took me 7 hours plus to build, I thought I completely nailed it then I went back did some various double checking of measurements from different angles and I was off a hair....partially tore it down and rebuilt it to spec.
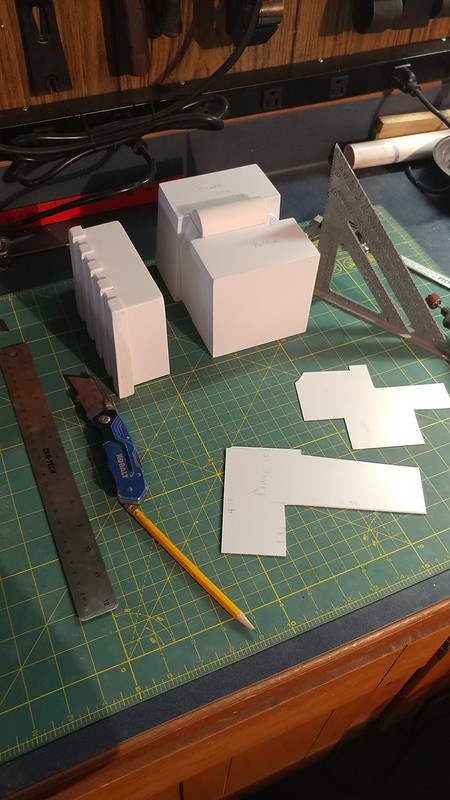
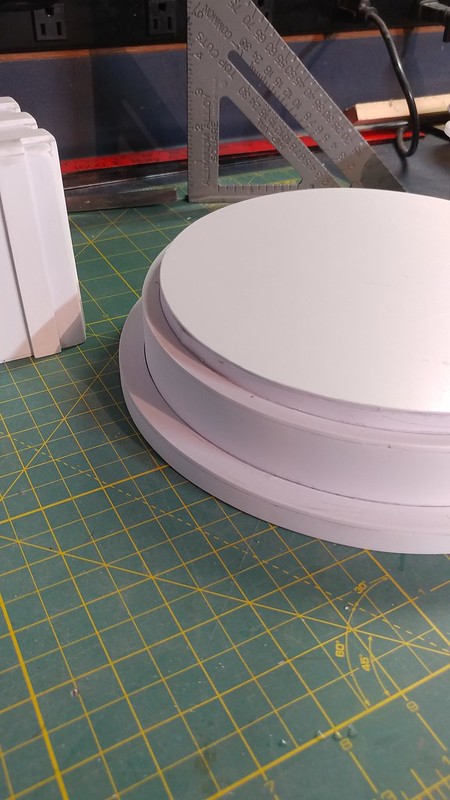
Here is the styrene workspace to start with. I usually start by measuring all my templates/faces out on some styrene. I always cut a tad more so I have material to work with in case I was off or undercut.

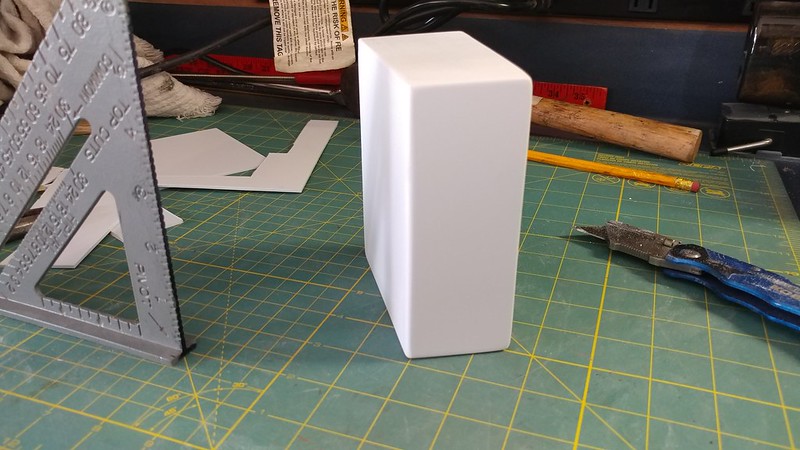
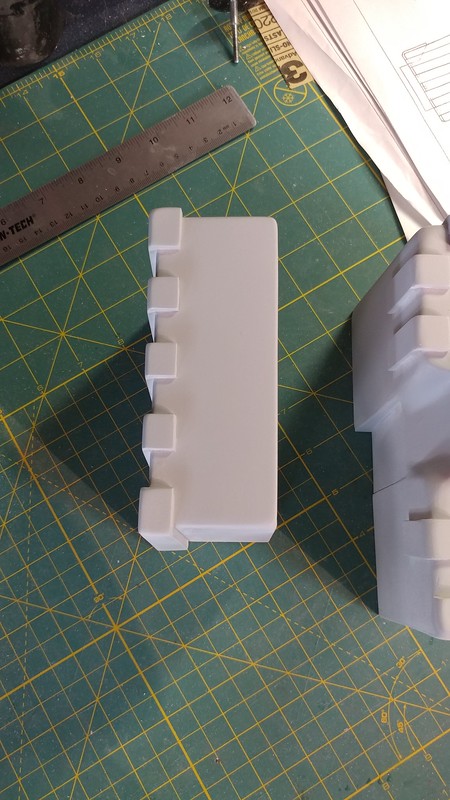
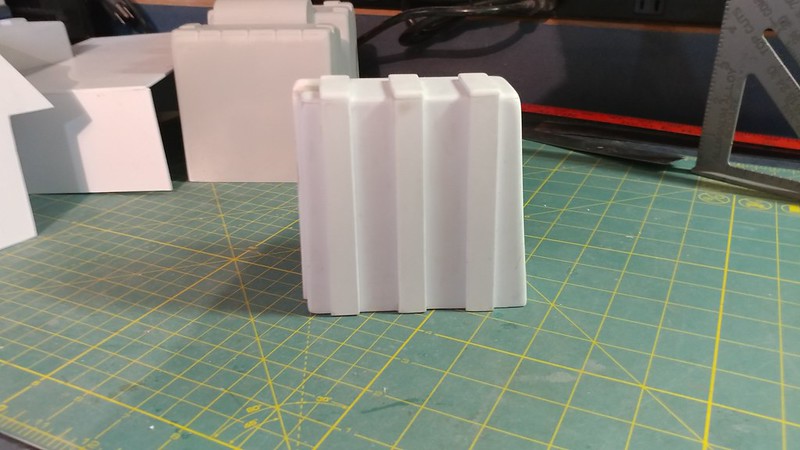
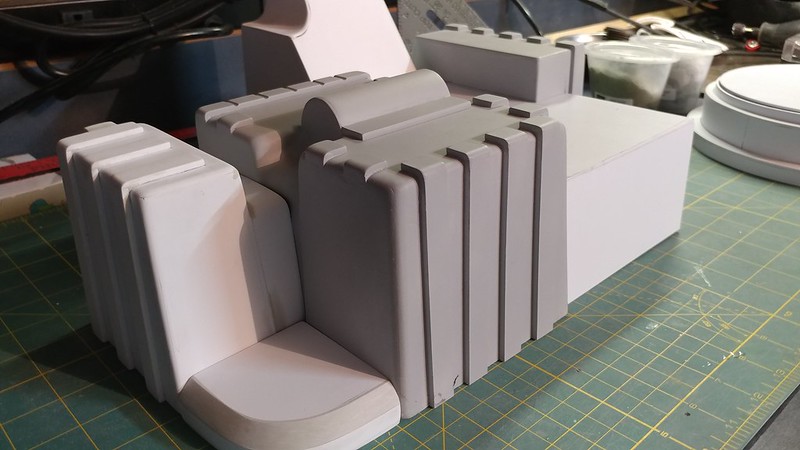
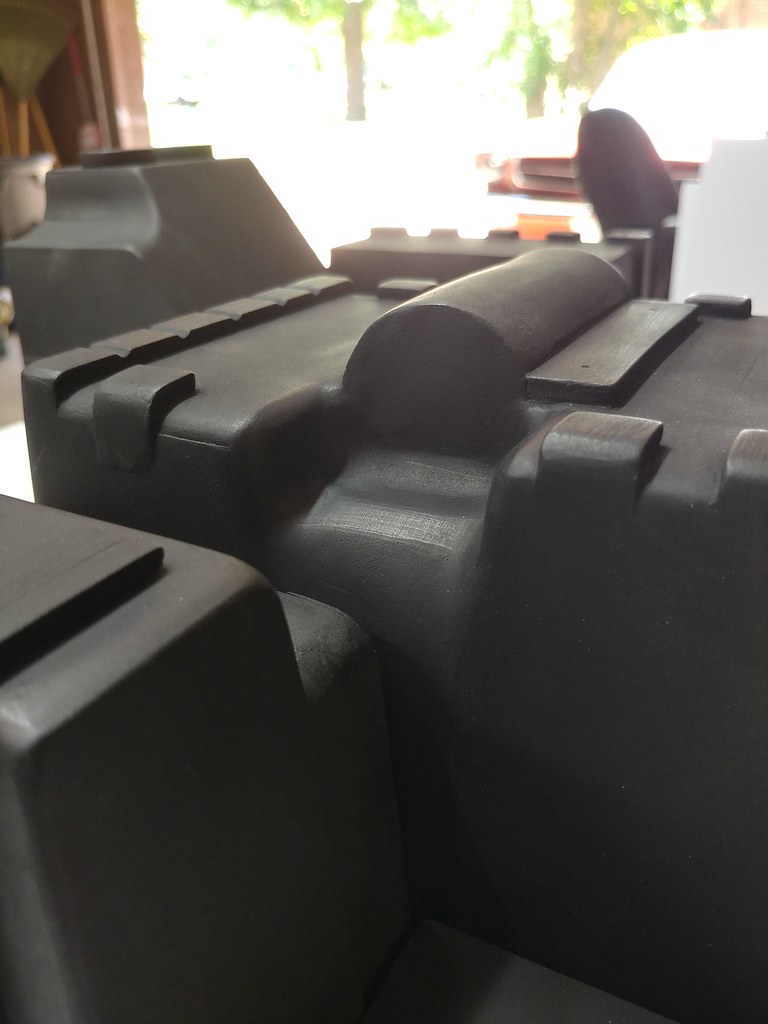
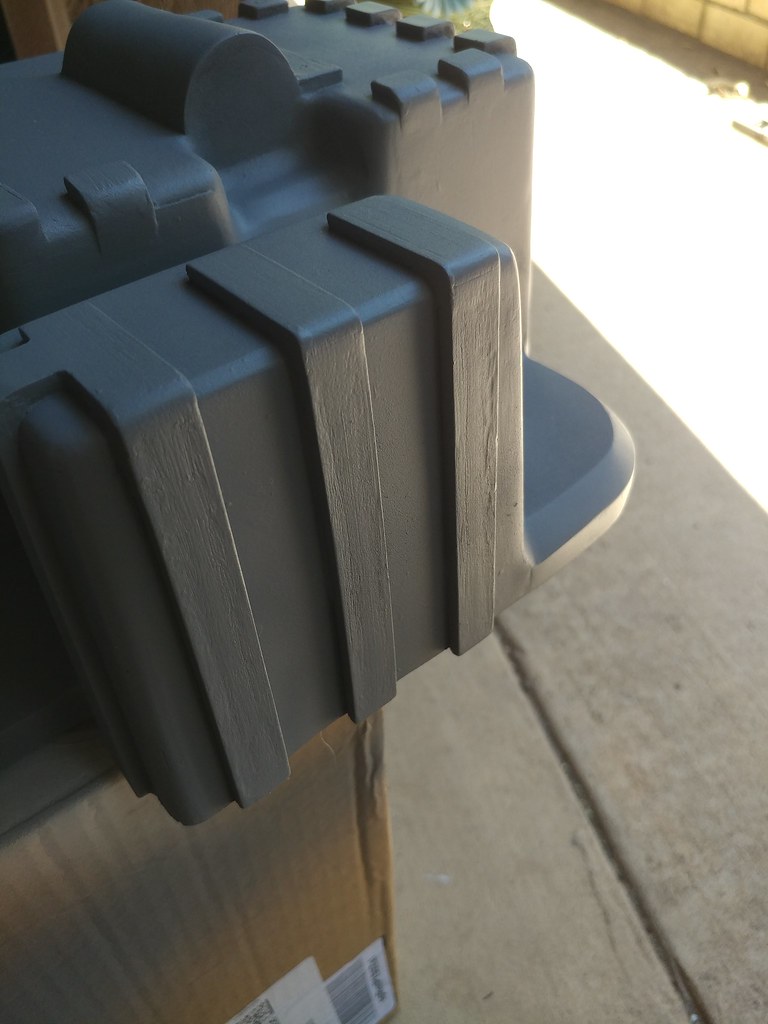
Start gluing all my faces together and sand smooth. At this point I start dremeling with a sand drum all the curves and corners to match the screen used packs before I start placing on the ribs. I also do another check of measurements to make sure I'm good on all angles in case I'm not I could easily readjust.
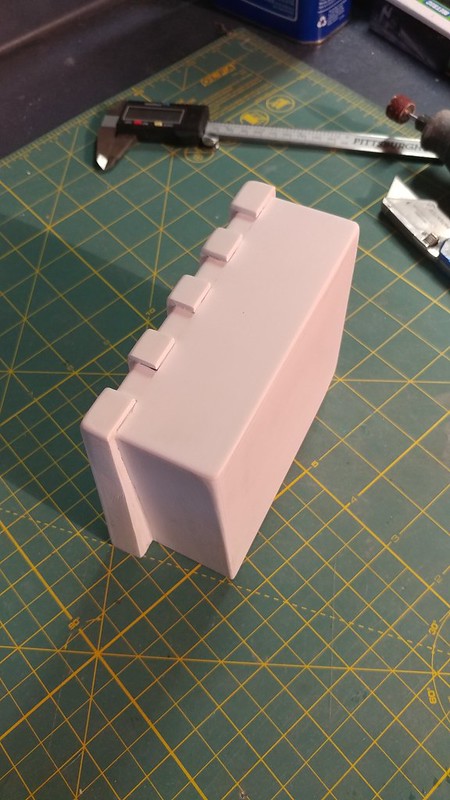
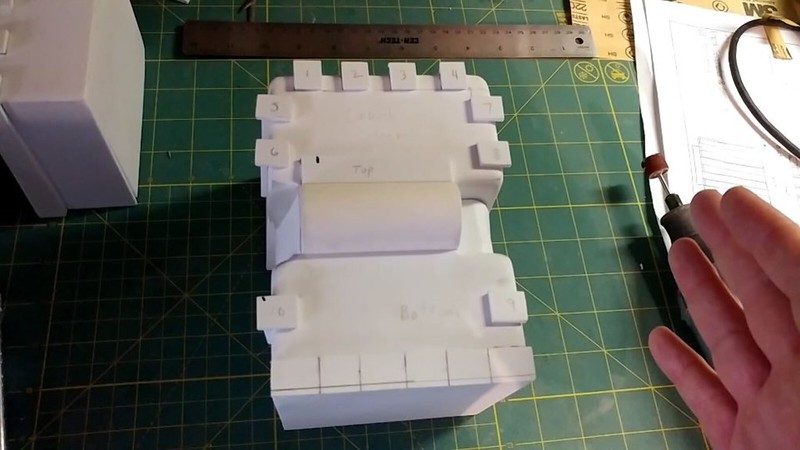
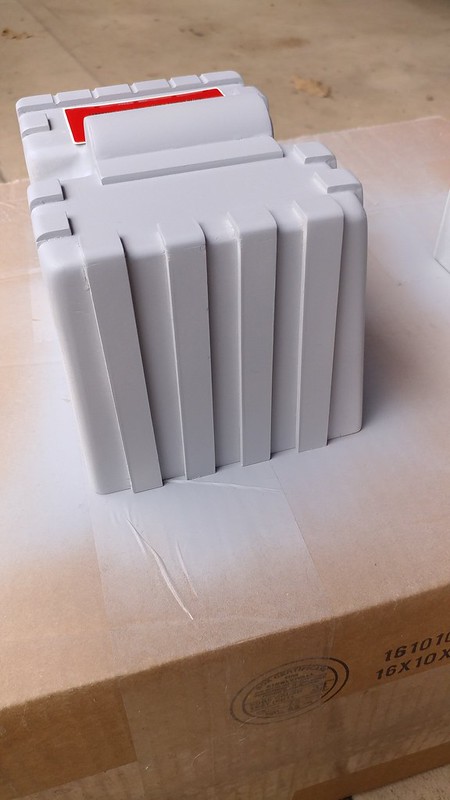
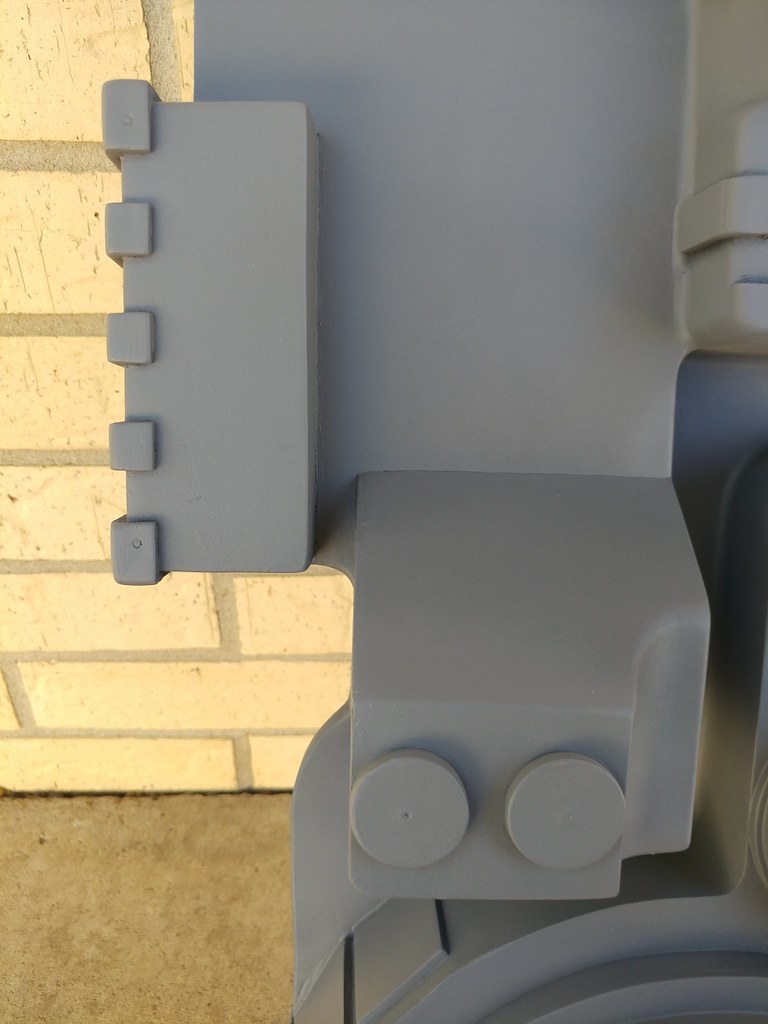
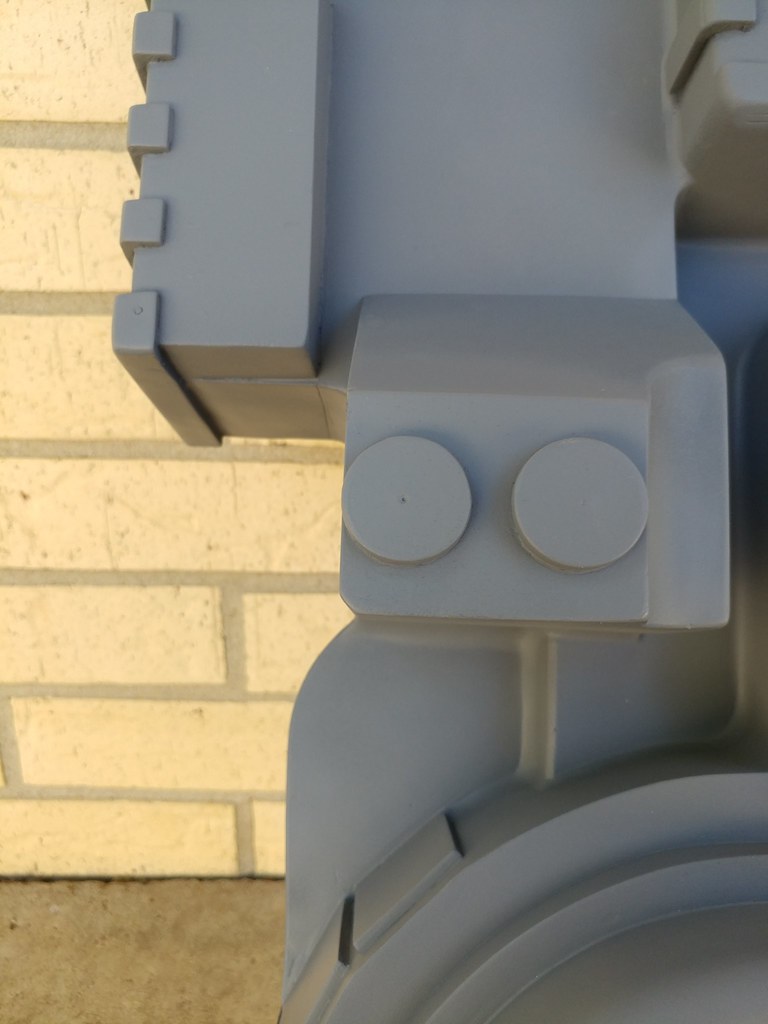
Starting measuring and sketching where the ribs will go. The sketch on the box is just a rough draft of where the ribs will go. As I'm putting each rib on I'm using my ruler to make sure each rib goes in its precise spot.

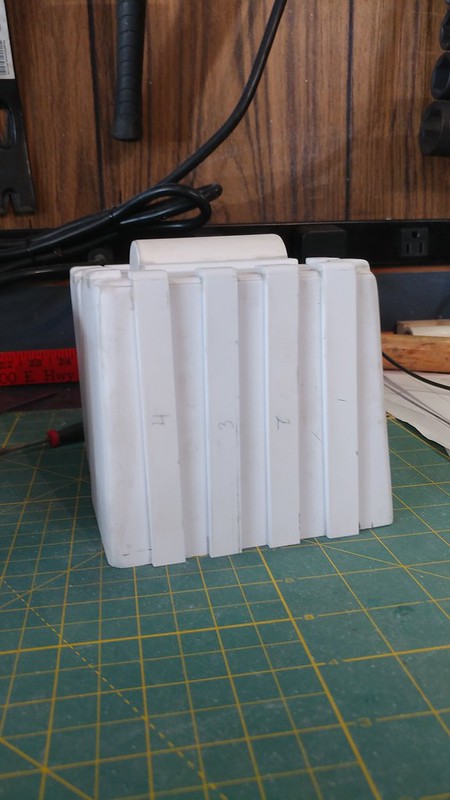
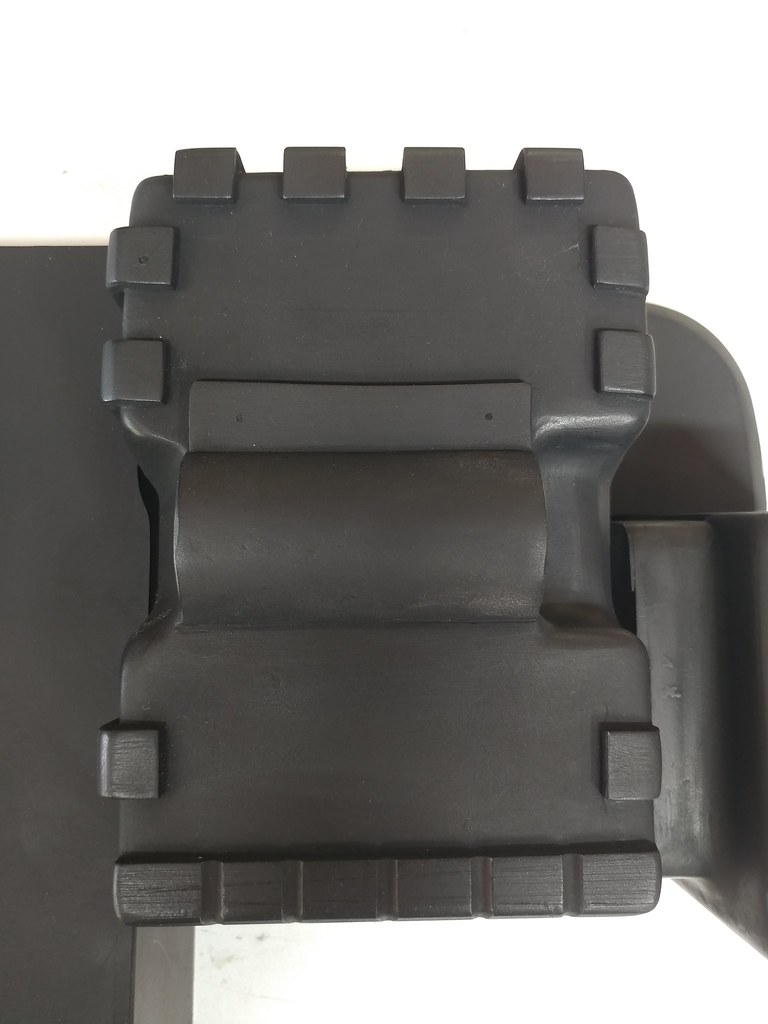
Hours later were finished
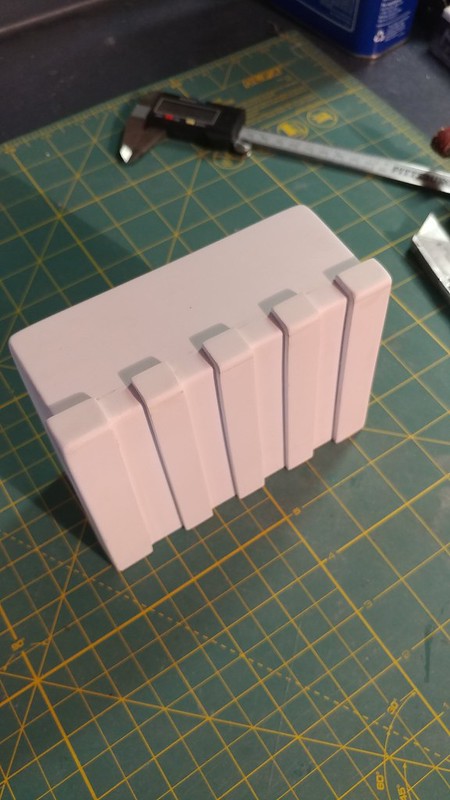
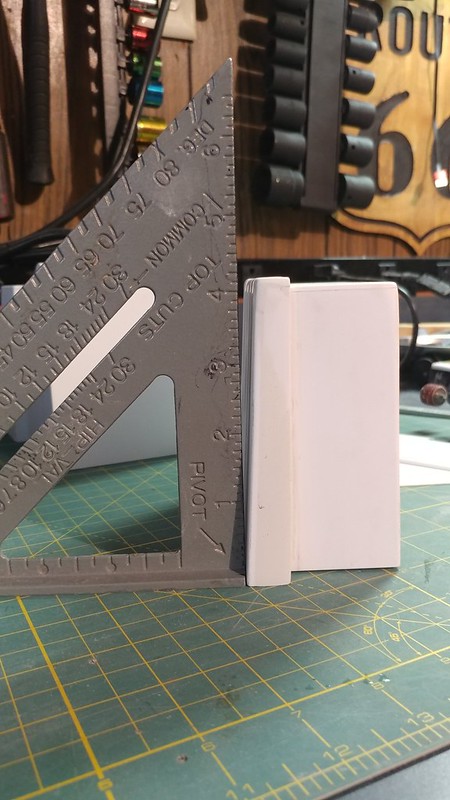
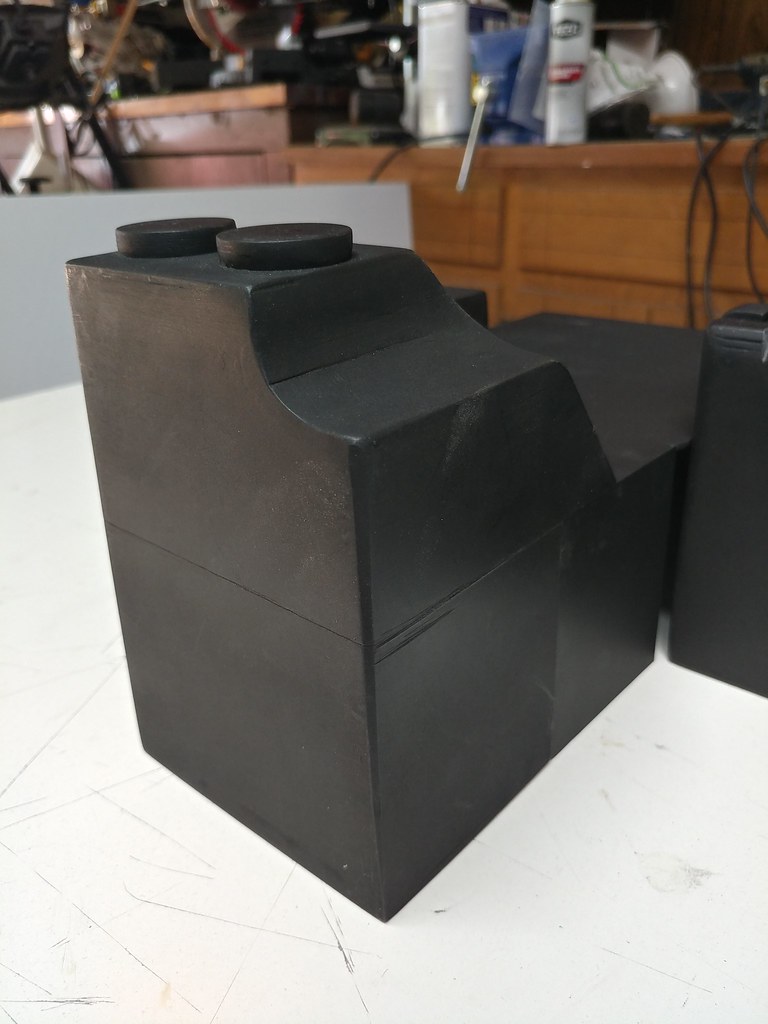
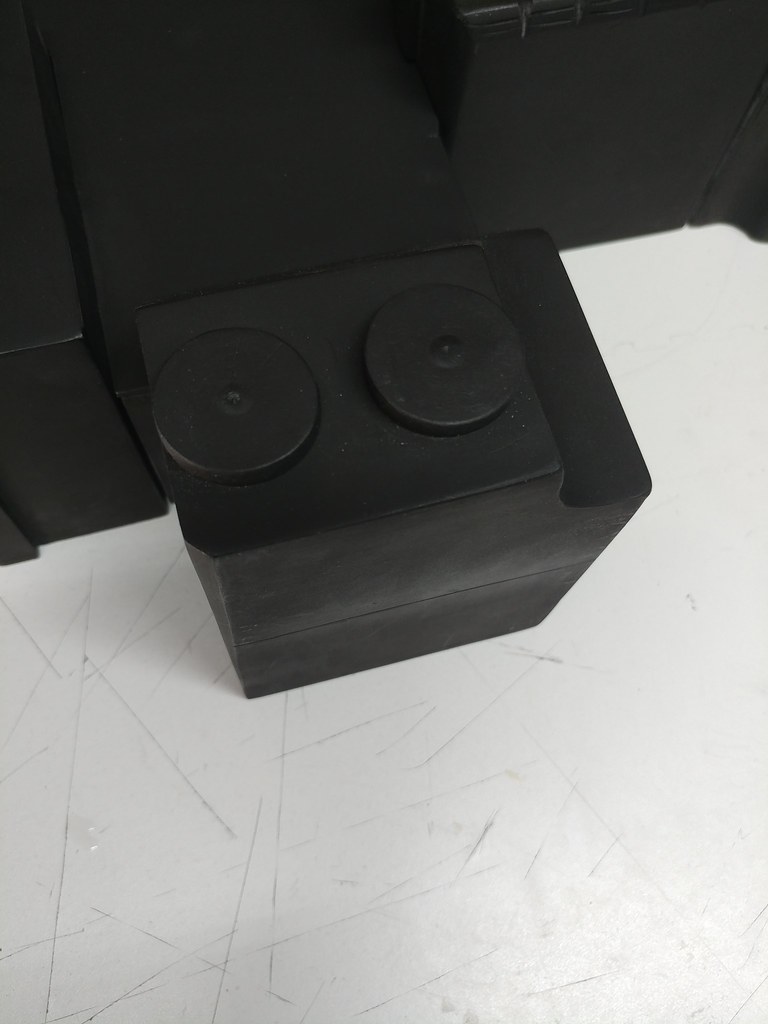
All the angles and tapers are to spec and I'm happy with it!

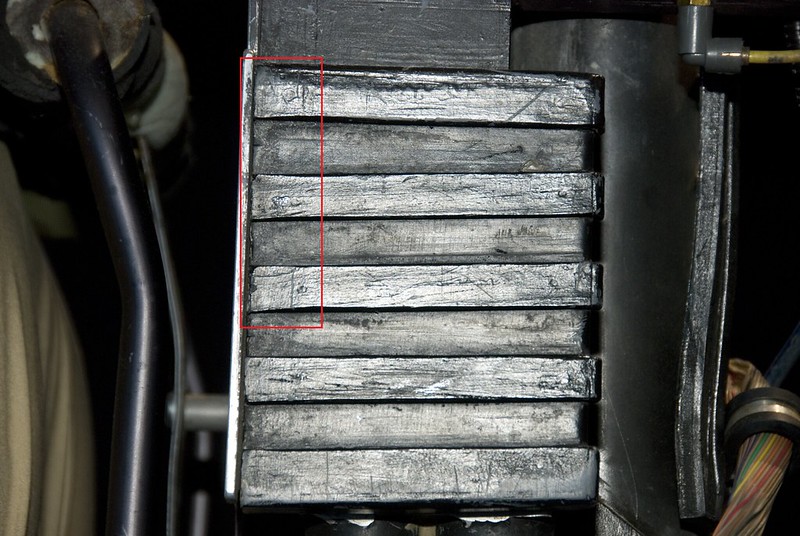
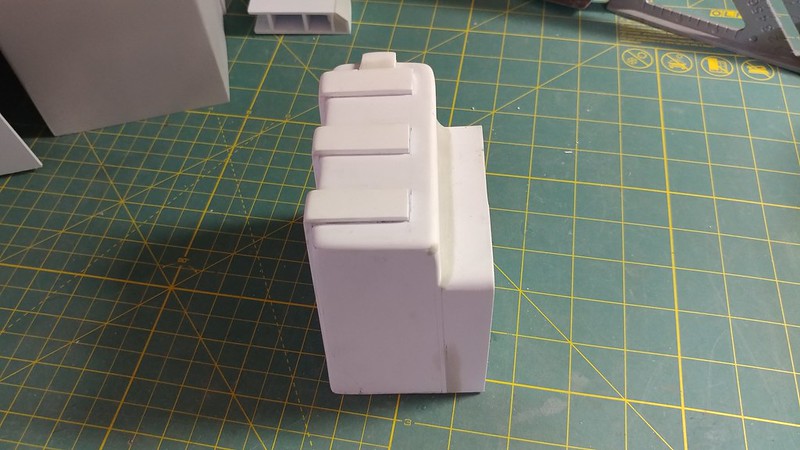
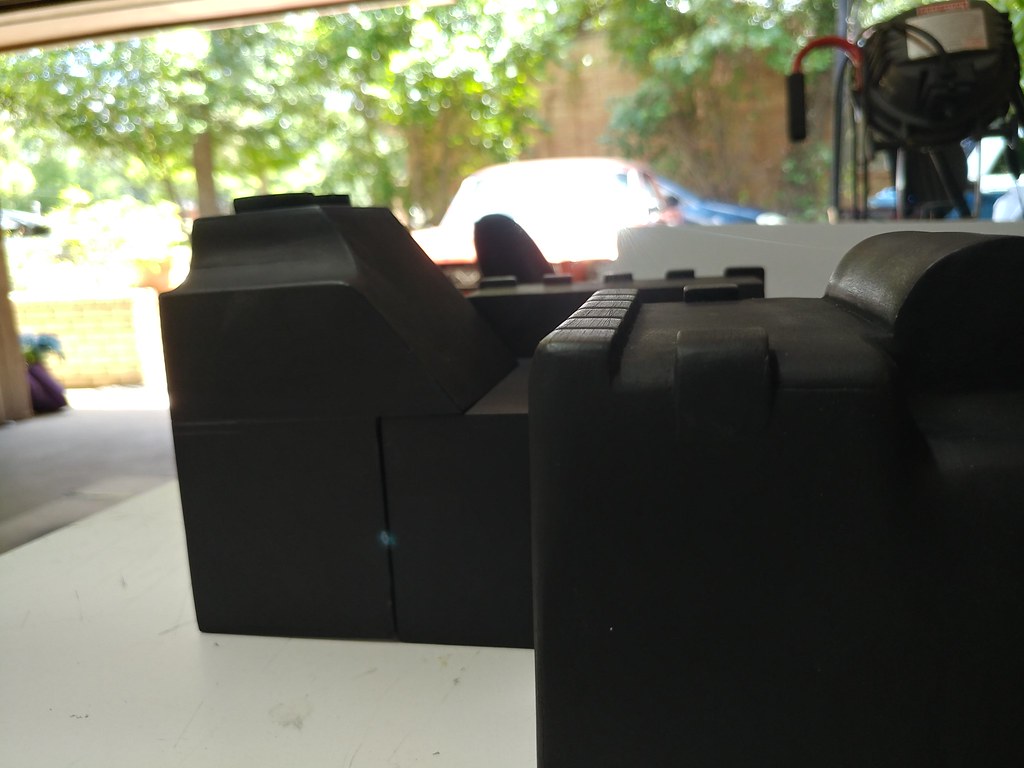
On a side note the powercell on the screen shells has a taper where the base of the power cell is wider then the front which causes this slight angle.
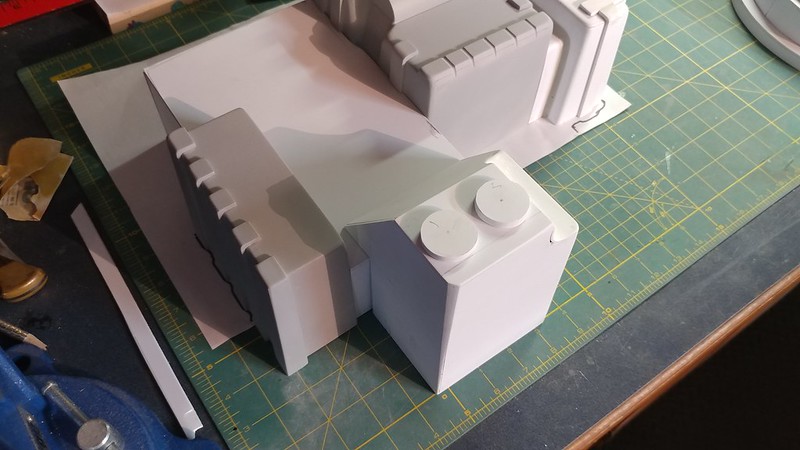
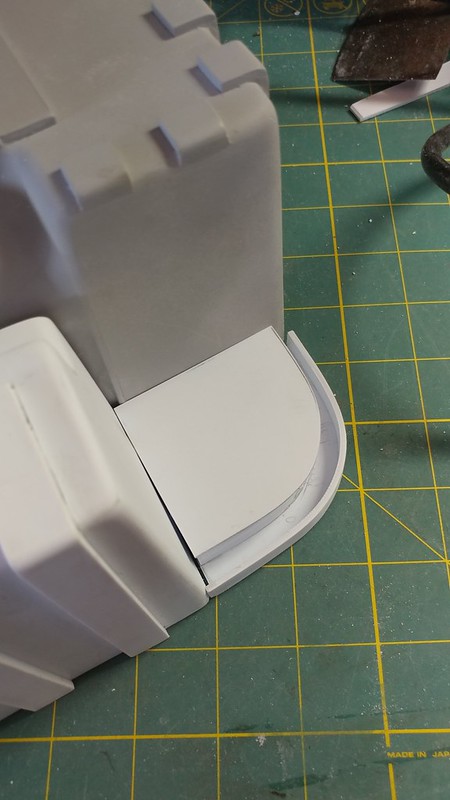
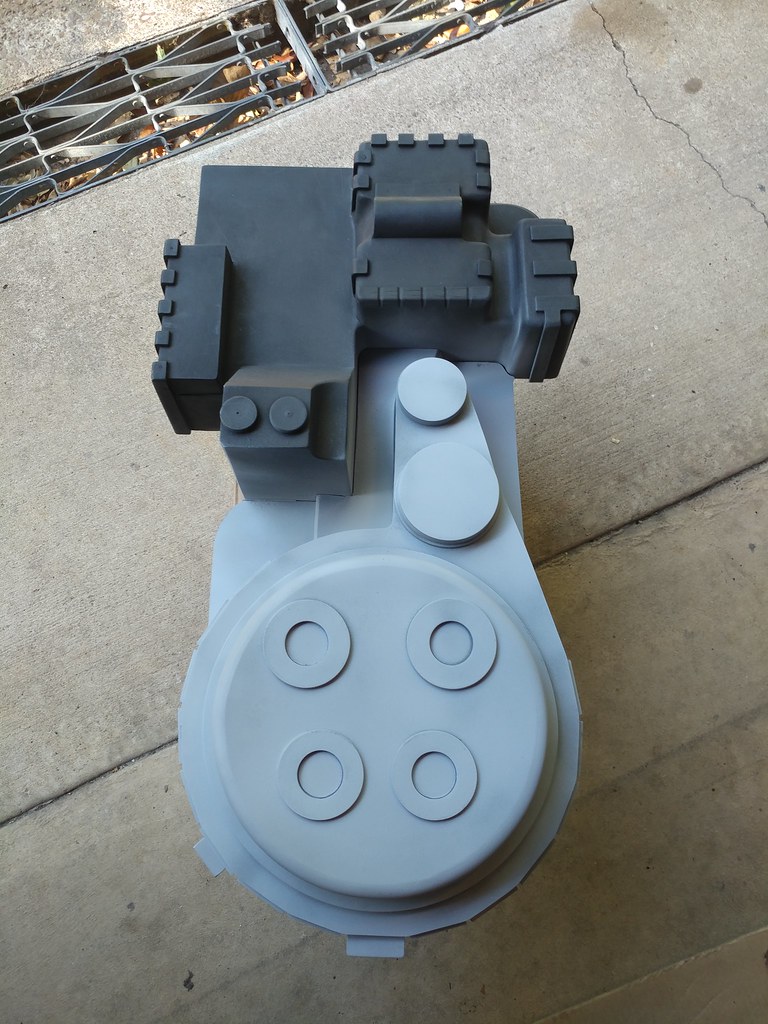
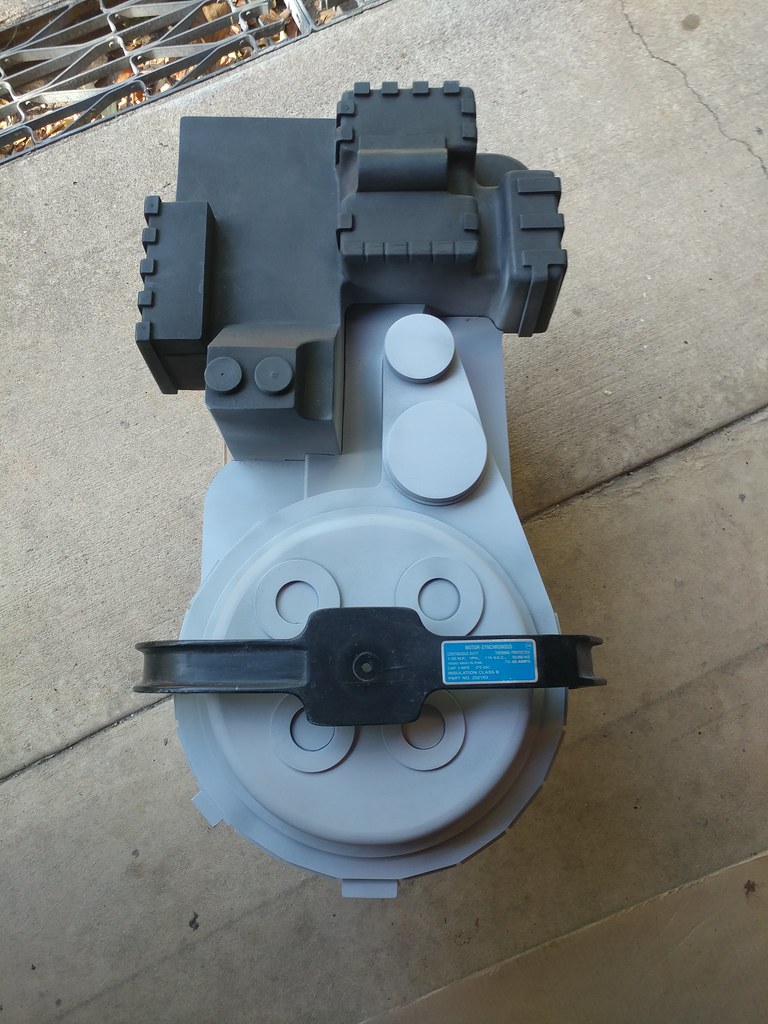
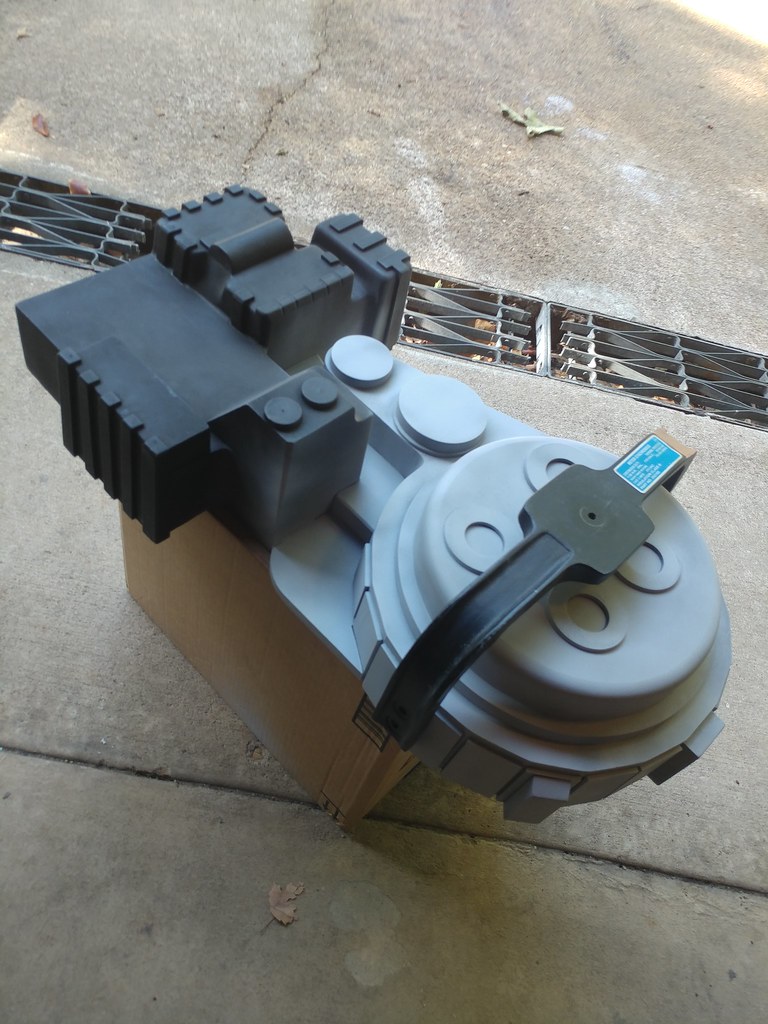
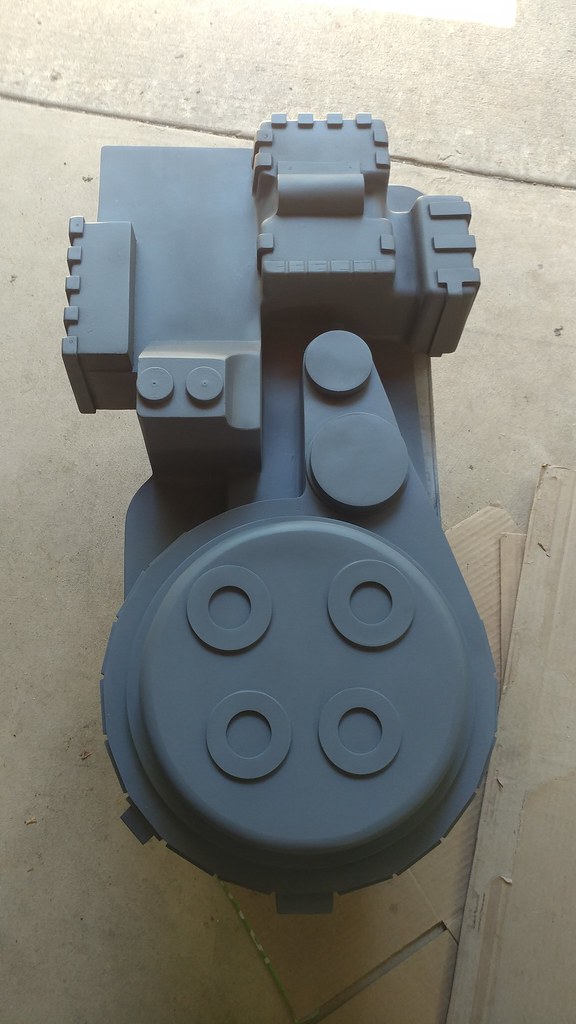
Now were moving on to the crank gen. The crank gen is an absolute beast to build and probably one of the hardest parts of the shell to build especially when trying to match the screen used shells. There is so many uneven measurements, tapers, and wonkiness to it. So far I've slayed the beast and wounded it to my liking but it's still half way alive and need to further slay it to my liking. On to putting the finishing touches on it and getting all the corners rounded off, sculpted and smoothed out.
Thanks for looking and all comments are welcome!
I've got some new measurements from MBurkit (Thank you) in addition to some previous ones I've had that might help fill in some gaps in the areas I more or less had to guess. I know Mack Factory is releasing a direct cast Sony Lobby Hero/Spengler shell that will put an end to all the measurement speculation but until then I thought it would be more fun and perhaps nostalgic to be like the old days and try to get as close as I can without having it on hand.
As for the materials I will be using .080 styrene for most of the structure and of course will be using .125 (1/8 inch) for the various ribs, cyclotron rings, and syncgen plates. Looking back in hindsight I can't believe I finished my first shell in roughly 2 months. This shell might take a little longer then that as I plan to be a lot more tedious with the measurements.
Of course I started with the powercell like my last build. This probably took me 7 hours plus to build, I thought I completely nailed it then I went back did some various double checking of measurements from different angles and I was off a hair....partially tore it down and rebuilt it to spec.
Here is the styrene workspace to start with. I usually start by measuring all my templates/faces out on some styrene. I always cut a tad more so I have material to work with in case I was off or undercut.
Start gluing all my faces together and sand smooth. At this point I start dremeling with a sand drum all the curves and corners to match the screen used packs before I start placing on the ribs. I also do another check of measurements to make sure I'm good on all angles in case I'm not I could easily readjust.
Starting measuring and sketching where the ribs will go. The sketch on the box is just a rough draft of where the ribs will go. As I'm putting each rib on I'm using my ruler to make sure each rib goes in its precise spot.
Hours later were finished
All the angles and tapers are to spec and I'm happy with it!
On a side note the powercell on the screen shells has a taper where the base of the power cell is wider then the front which causes this slight angle.
Now were moving on to the crank gen. The crank gen is an absolute beast to build and probably one of the hardest parts of the shell to build especially when trying to match the screen used shells. There is so many uneven measurements, tapers, and wonkiness to it. So far I've slayed the beast and wounded it to my liking but it's still half way alive and need to further slay it to my liking. On to putting the finishing touches on it and getting all the corners rounded off, sculpted and smoothed out.
Thanks for looking and all comments are welcome!
Last edited by pchrisbosh1 on September 11th, 2022, 10:40 am, edited 10 times in total.
My Youtube Channel https://www.youtube.com/channel/UC6ouqz ... 1nbpw6VK_Q
My first GB1 scratchbuild viewtopic.php?t=28742
My GB1 Production shell build viewtopic.php?f=2&t=24965
My beautiful wife's Etsy accounthttps://www.etsy.com/shop/betsysloops who does wonderful crochet items,
-Chris
My first GB1 scratchbuild viewtopic.php?t=28742
My GB1 Production shell build viewtopic.php?f=2&t=24965
My beautiful wife's Etsy accounthttps://www.etsy.com/shop/betsysloops who does wonderful crochet items,
-Chris


 - By pda4ever
 - By mrmichaelt
 - By UncannyGirl